Showing posts with label DIY. Show all posts

Sunday, January 1, 2012

My last project of 2011

So this was my first attempt at recovering a seat to a chair. This is something I helped my mom with once upon a time, I've seen on numerous TV shows, but never tried myself. Actually it's pretty easy, it's kinda like wrapping a present...in fabric...with a staple gun. Here's the break down--

1) Take an old chair. (I scored this one at a thrift store for $5.) Unscrew the seat from the legs.

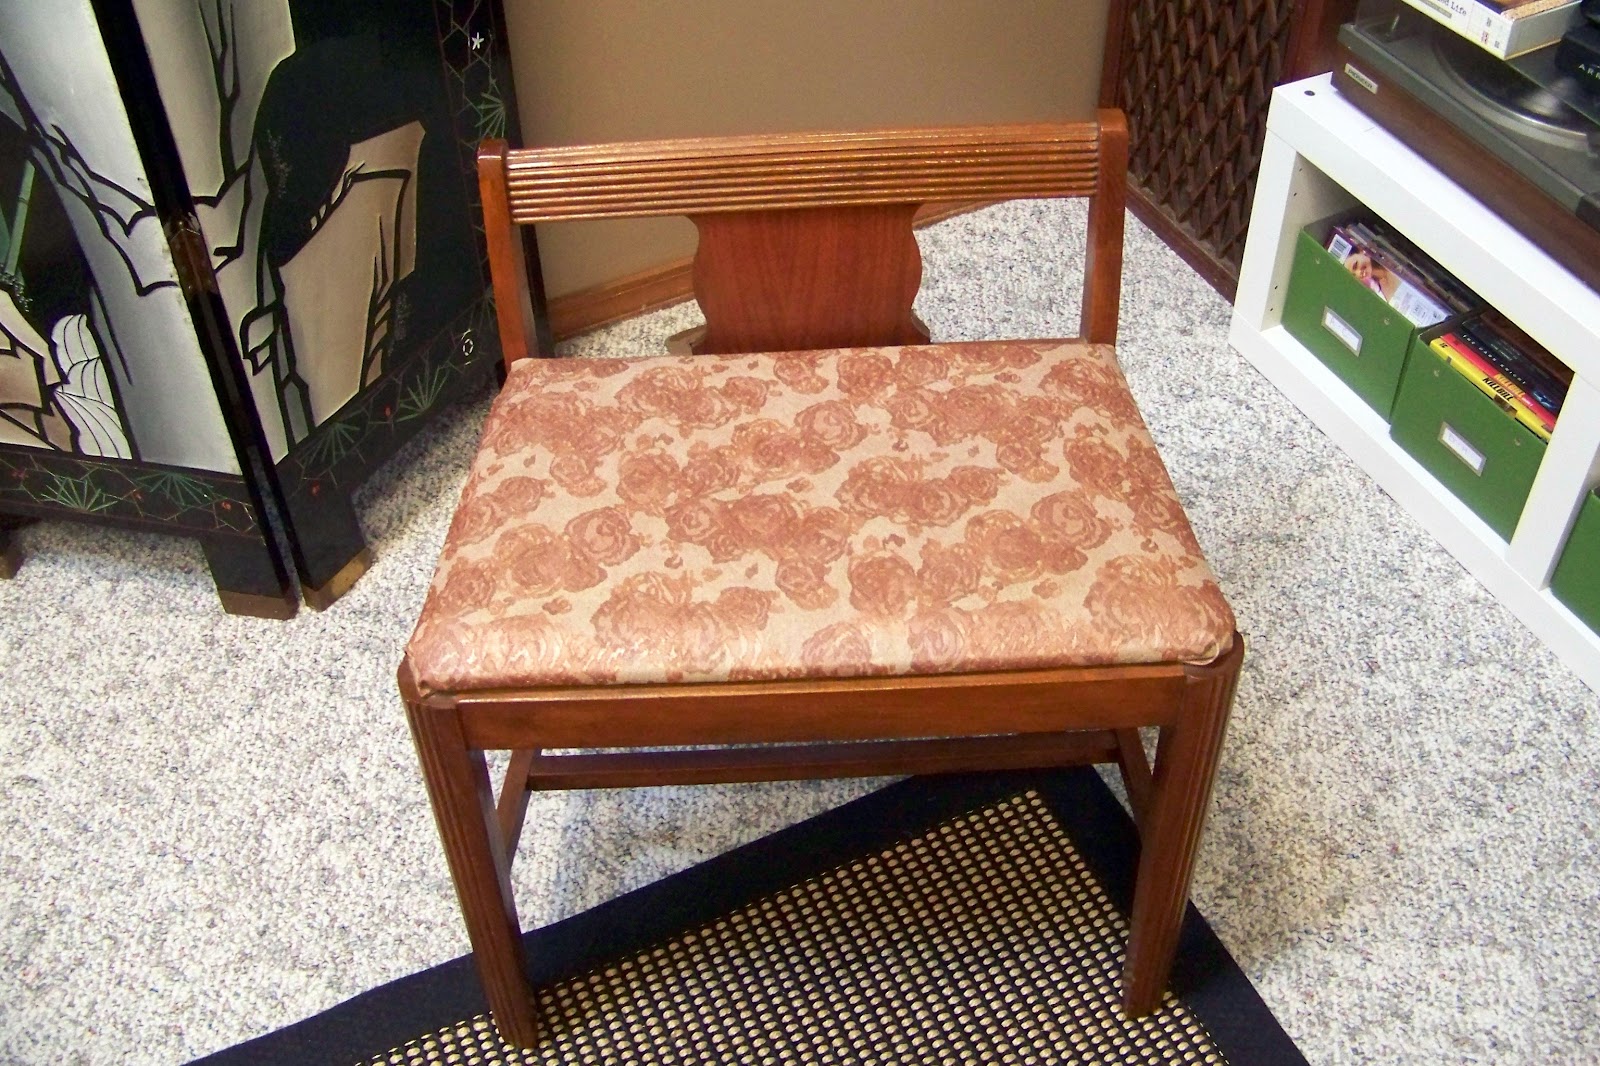
I liked the chair right away, but the fabric just wasn't for me. 

2) Remove old fabric. Cut new fabric to about an 1-2 inches of overlap. I did two inches, but after it was all said and done I realized it didn't need to more than an inch of overlap. And, I actually cut the new fabric and a white piece of muslin, so I was attaching two layers to the chair. (I got my new fabric from Hobby Lobby with a gift card from the holidays; 2010 holidays to be exact.) Tip: When cutting the fabric make sure that you are getting the part of the pattern where you want it on the seat. 

3) Start by stapling a single staple in the "north" and "south". Fabric should be taut, but not stretched. 


4) Now do the same on the "east" and "west" side of the seat. Flip it over and take a peek. 

5) On to the corners. Staple the very corner at a diagonal. Again pull taut but do not stretch. 


6) Neatly pull to the left and right of the corner up, and staple. 


7) Finish up by stapling all along the edges, filling in from the corners to the first staples from steps 3 and 4. 

8) Reattach seat to chair, in this case with screws. 

While I did the re-upholstery, my hubby gave the chair a good cleaning with wood cleaner. Here's the end product...


Boom! A new chair I love for about $5. Perfect to go by the shoe and coat closet to put on those winter boots. 


Wednesday, December 28, 2011

Our Entry Way...it's like a museum of us!

We've hung pictures in our entry way, and I love them! It reminds me that we live here.

We didn't plan out our pictures first and just took a more creative approach, and started in the middle, and moved towards the ends of the hallway. The really nice thing about not buying additional things to decorate our new space is that all of  our belongings are on remix! At our house the color frames were in one room, the black frames in the hallway, and the "Keep Calm and Carry On" canvas was in my office at work; now they all go together and I am really happy about the result. Many of the pictures are from our wedding, trips and travels, and good friends--it makes me really happy to see everything on a daily basis again.

It was kinda hard to shoot the long narrow hallway, but here are my best attempts. Let me know what you think, I love comments :)


Tuesday, December 27, 2011

Moving In & Getting Organized

So we've been unpacking, and unwrapping all the things that we all too recently wrapped and packed up to move. I've decided to not buy anything new for our apartment here in Bloomington, with the small but awesome exception of the Charley Harper prints I now having hanging in our living room/dining room. Charley Harper is my favorite artist, many of this pieces have to do with animals and wildlife, and these in particular where commissioned by the National Park Service, another favorite of mine. I love them, love them love them--and got them for a great deal at the U.S. Government Bookstore. (I found them from a tip on Retro Renovation and hopped on the internet to order straight away.) This is how they look, let me know what you think...
Yes, that is Matlock on TV 


And as always, I like to show a few pictures of the process. Lots of figuring out placement, measuring, and sinking anchors and screws. 


We also hung my hubby's Great Aunt's painting above the fireplace. I think it looks great!

Lots of Christmas decor on the shelves and mantles, maybe I'll even go back and take a few pics after Christmas has cleared out and everything is set up "permanently". And speaking of Christmas, one, the JOY decoration on the fireplace was made by my bestie, Kelly, owner of Petals by the Shore, I just love it! And two, here's an obligatory picture of our Christmas tree.


I really hope everyone had a wonderful holiday!

Saturday, July 23, 2011

Our Bedroom, Kitten Approved

So if you remember (or even if you don't) we began a little "facelift" to our bedroom back in March, and it's been nearly finished for a long time, but we finally completed it! I think it looks great!

We painted all the trim white, removed the rug (it was gross), made it so we could each have an alarm clock on our side of the bed, put in reading lights on both sides of the bed, put in a new ceiling fan, and painted and trimmed out the ceiling. Take a look! "Befores" on the left, "Afters" on the right...


One more "After"...

Don't be fooled by the crop of the above pictures, the room looks bigger than ever, and is cleaner that it's been in a long time. I know the projects were a complete success because the room has been kitten approved!


Thursday, July 14, 2011

This birdie has a new lease on life!

A couple of summers ago my mom got me pretty ceramic mushrooms, the biggest with a little birdie sitting on top. Well after a few year in the ground, the largest garden ornament lost it's stake and the bottom of the mushrooms broke too. I kept them because I thought they were pretty and didn't want to get rid of them, but I didn't exactly know what to do with them either. Well, Hubby found a cool piece of wood in our backyard, and an idea was born!

I had Hubby drill some large holes in the cool looking log, and I dripped some epoxy in the drilled holes and around the base of the mushrooms, and ta-DA!! I'm really liking the way it all turned out and that these gifts got a new life on my garden table.


Sunday, July 10, 2011

Fence Flower

So back in the spring my husband picked me up a magazine called "Flea Market Gardens" which I loved. I wish I could link to it, but I can't seem to find a website to go along with it; but if you too came across it you may have seen the article "Glass Act". In the article they made "flowers" by stacking plates, which I thought looked really cool, so I set out to find plates. I instead found a metal placemat, a white plate with gold trim, and bundt pan at Goodwill and said perfect! While at home I also found a rusty little bell that fell off some wind chimes. One by one I glued them together using epoxy, and made a tiny twine hanger.  


A screw was sunk into our fence post, along with a dark green metal stake that we used to use for Christmas decorations but have since abandoned for a better solution. I think the finished product looks really cute, and just makes me want to make more flowers for my fence!

And an extra pic of the side yard with coneflowers, queen ann's lace and metal javelina I bought with my little brother in Arizona. These coneflowers are looking much healthier than they have in years past!

Saturday, July 9, 2011

Backyard Wooden Windchimes

Easy as drill, knot, hang!

I found the wooden kitchen utensils and metal colander at a thrifts stores all for about $2. I used twine from home and knotted through the utensil holes that I drilled and then knotted the other end of the twine through the colander. Of course fishing line, or any host of products could be used instead, but I liked the more rustic look of the twine. I drilled a hole and the top and bottom of one of the spoons to attach an additional spoon for the middle "chime".

I made the hanger for the wind chime in a similar fashion, tying knots to the holes in the bottom (now top) of the colander, and viola!

When the wooden/bamboo utensils hit together it gives a really nice earthty mellow thud--very zen.

My one tip is to the leave the string long enough so that all the utensils can clang together easily. Mine are long enough, but if I were to do it again, I might make them a tad longer.

Here are a few more pictures...


Sunday, June 12, 2011

Resale Table Turned Garden Furniture


We found this wooden chunky leg table back in early spring at a resale store and I completely fell in love. The base is painted bright yellow, but the top needed to be stained so it could stay outside. Sooo...

1) Sand.

2) Stain. (We used transparent deck stain.)

3) Admire and put into place. 


Monday, April 11, 2011

#9 Paint Bathroom Mirror White, #10 Replace Old Switch Plates with New White Ones

The titled tasks kinda describe themselves perfectly...

Here's where we had left off...

Here's now...

I'm glad we decided to reuse the mirror and paint it white--it was more economical and earth-friendly. I really like the amount of white in the bathroom now! That door across from the mirror better look out, it might be painted next!

#21 Trim Out Ceiling

So we completed another big project on our list of projects, we trimmed out the ceiling in our bedroom. The project started a few weeks ago when we did a few other projects in our bedroom. Here's a picture of the nearly completed bedroom ceiling...


Here's what we did to tackle this project...

1) Measure in an even amount (you choose what you'd want to do, for us it was about 14" on each side) around the entire ceiling. We measured in every foot or so and then connected the dots with a straight edge making a solid box on the ceiling. 


2) Prime and then paint the entire square.


3) Then measure the lengths of the painted sides and cut trim accordingly, cutting at 45 degree angle at the corners. That kind of over simplifies it a bit, but that is basically what you do. Tip: 1) Cliche as it might sound measure twice, cut once. 2) Remember, the trim will be stuck to the ceiling bottom side up, so either cut with the back side of the trim up, or remember to angles will be reversed if cutting back side down.

4) Paint the trim pieces.

5) Put the trim pieces up on the ceiling using liquid nails or adhesive caulk and finishing nails. Use a lot of caulk to ensure the trim pieces stick and put a nail in every 6" or so. Tip: 1) We found two length finishing nails at the local hardware store. We thought the shorter ones would have been fine, but that would have been a mistake, use the longer finishing nails to sink as far as possible into the ceiling. 2) Get ready for lots of caulk jokes like "squeeze my caulk", "this caulk just exploded all over", "the tip of caulk is all sticky", etc--have fun with it, because there is truly no escaping them.

6) Using a paintable spackle, patch nail holes and trim piece seams.

7) Paint over spackle. (We actually haven't done this part yet, but it is next on the list!)

8) Enjoy!!

Check out the cool new ceiling fan too!

Just a few more finishing touches and the bedroom will be complete and I'll post all the "after" pictures!!