Showing posts with label backyard improvement. Show all posts

Monday, August 22, 2011

Reaping what I sow!

So a while back I did some sowing of wildflowers in our back yard. I did it a little late in the summer, but the seeds have sprouted and I'm finally seeing some awesome wildflowers. Take a look...


Next to my fence flowers


A few more days and everything will be FULL bloom! Can't wait!


Thursday, July 14, 2011

This birdie has a new lease on life!

A couple of summers ago my mom got me pretty ceramic mushrooms, the biggest with a little birdie sitting on top. Well after a few year in the ground, the largest garden ornament lost it's stake and the bottom of the mushrooms broke too. I kept them because I thought they were pretty and didn't want to get rid of them, but I didn't exactly know what to do with them either. Well, Hubby found a cool piece of wood in our backyard, and an idea was born!

I had Hubby drill some large holes in the cool looking log, and I dripped some epoxy in the drilled holes and around the base of the mushrooms, and ta-DA!! I'm really liking the way it all turned out and that these gifts got a new life on my garden table.


Sunday, July 10, 2011

Fence Flower

So back in the spring my husband picked me up a magazine called "Flea Market Gardens" which I loved. I wish I could link to it, but I can't seem to find a website to go along with it; but if you too came across it you may have seen the article "Glass Act". In the article they made "flowers" by stacking plates, which I thought looked really cool, so I set out to find plates. I instead found a metal placemat, a white plate with gold trim, and bundt pan at Goodwill and said perfect! While at home I also found a rusty little bell that fell off some wind chimes. One by one I glued them together using epoxy, and made a tiny twine hanger.  


A screw was sunk into our fence post, along with a dark green metal stake that we used to use for Christmas decorations but have since abandoned for a better solution. I think the finished product looks really cute, and just makes me want to make more flowers for my fence!

And an extra pic of the side yard with coneflowers, queen ann's lace and metal javelina I bought with my little brother in Arizona. These coneflowers are looking much healthier than they have in years past!

Saturday, July 9, 2011

Backyard Wooden Windchimes

Easy as drill, knot, hang!

I found the wooden kitchen utensils and metal colander at a thrifts stores all for about $2. I used twine from home and knotted through the utensil holes that I drilled and then knotted the other end of the twine through the colander. Of course fishing line, or any host of products could be used instead, but I liked the more rustic look of the twine. I drilled a hole and the top and bottom of one of the spoons to attach an additional spoon for the middle "chime".

I made the hanger for the wind chime in a similar fashion, tying knots to the holes in the bottom (now top) of the colander, and viola!

When the wooden/bamboo utensils hit together it gives a really nice earthty mellow thud--very zen.

My one tip is to the leave the string long enough so that all the utensils can clang together easily. Mine are long enough, but if I were to do it again, I might make them a tad longer.

Here are a few more pictures...


Sunday, June 12, 2011

Weeding and Sowing

Today I spent most of the day weeding the bed we put in last year next to our gravel patio. After a very busy May, the bed had not been tended to at all this season--though some of the perennials have been doing just fine without me. After weeding, hubby tilled around the plants and I planted some nasturtium around the boarders and then some more of the seeds I bought earlier in the year ( poppies and chinese forget-me-nots for this area). Though, the seeds in the front beds are sprouting up, I am always unsure how seeds will come in...I guess we'll just need to wait and see.

End of April

Today

An improvement, right?

Resale Table Turned Garden Furniture


We found this wooden chunky leg table back in early spring at a resale store and I completely fell in love. The base is painted bright yellow, but the top needed to be stained so it could stay outside. Sooo...

1) Sand.

2) Stain. (We used transparent deck stain.)

3) Admire and put into place. 


Tuesday, May 17, 2011

Sowing Seeds

Last night we took a little time in the front beds to weed and till up between the plants already coming in. Then I planted some wildflowers up there, and watered it all really well. I planted Five Spots up front because they are the shortest, then Chinese Forget-Me-Nots, and then some Red Cardinal Flowers in the back.

I hope they come in alright, I have had mixed success with seeds. I guess we'll see over the next month or so.

Thursday, February 3, 2011

I need a dose of spring!!!

I am desperate for spring and summer, so I took a little time today to order some wild flower seeds to plant in a few months. All of the following wildflower are from American Meadows.


I can't wait!!!


Sunday, September 19, 2010

What we did on our summer vacation

We build a gravel patio!!

When we moved in our house a few years ago, the backyard was one of the things that made us say "Let's buy it!" But that doesn't mean we did have some improvements to make. The site of our new gravel patio used to be where the previous owners had a swing set. We have a nice big deck off the back of our house, but the patio allows for more entertaining space and most importantly a fire pit. Below are the general steps we took to make our patio...

1) Dig down about 4 inches the entire area you are hoping to cover with your patio. That seems very simple but for us took the most time. Much easier to say than to do! Also, its good to have a plan of what you might want to with the displaced dirt.

2) Tamp the dirt.

3) Shovel in enough "traffic bond" or small pea gravel to cover the entire area to a 2 inch depth. You will want to make sure everything is relatively level at this step but a gravel patio is much more forgiving that a brick patio.
 

4) Tamp this layer of gravel.

5) Now the next steps are what we did, but is the fun and creative part, so if you are thinking about attempting a similar project have fun with this part. We added landscaping lumbers that matched the borders to many of our flowerbeds. We then put bricks lining the landscaping lumber. The bricks we used where also left by the previous owners, they are imperfect and discolored and I love them! Under the lumbers and bricks we put leveling sand. This is the part we were most concerned with everything being level. We got a long level and tried our best to have the sand level everything out. Though this was the step we were most concerned with leveling, we eyed a far amount of it too. (Again, way less particular than a brick patio.)


6) We also added a small star burst for where the fire pit would sit. We used a trash can lid, put sand around it, and then leveled out the bricks, each going longways and making a bursting pattern. Then, of course, removed the lid.

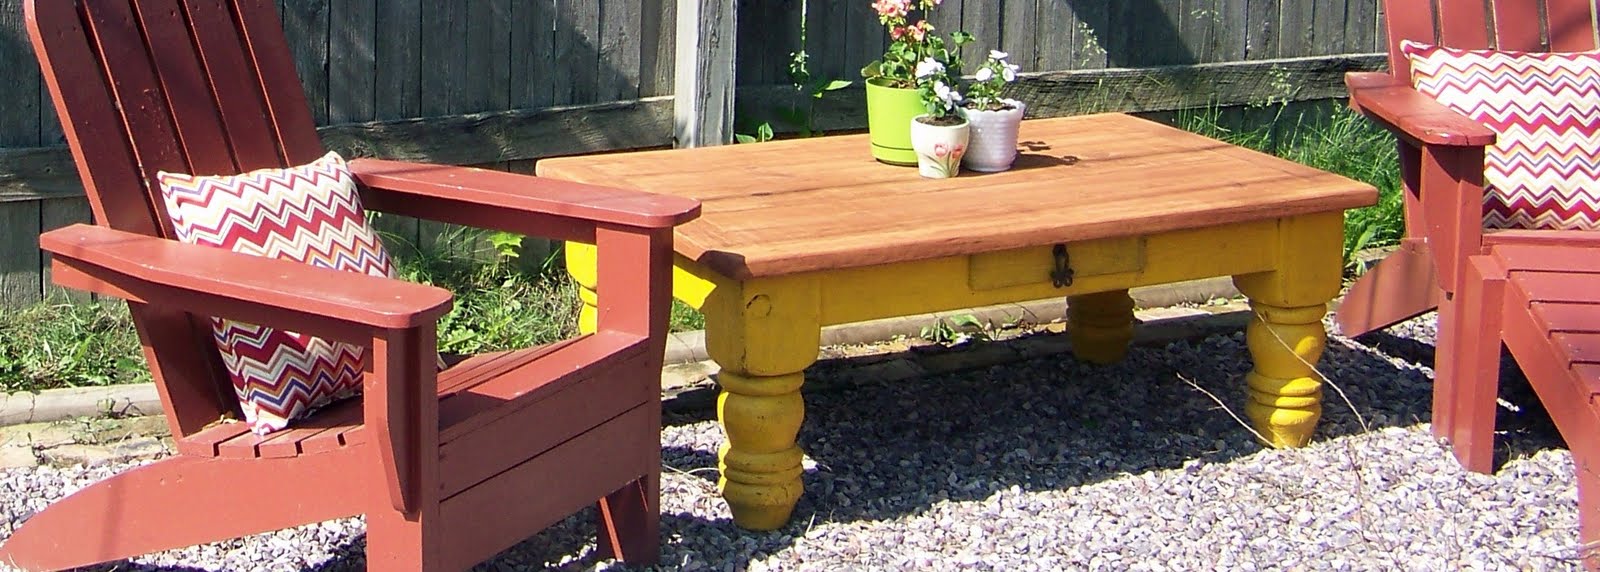
7) Pick out your gravel! We discovered while Lowes and Home Depot sold gravel it was much cheaper to buy from a bulk landscape place. However, that might be because we have a truck, delivery costs might drive up the price much more. We picked a purple granite mix.
 

8) After shoveling out all the gravel in the nooks and crannies, the only thing left to do is place your furniture, fire pit, and have a fire!!!

Tuesday, July 20, 2010

My First Garden

This is our first year gardening, and I think things are going pretty well. Here's some of our "crop"...

Cherry Tomatoes

Butternut Squash

Sweet Peppers

Nasturtium (Edible Flowers)

I'll show more as we "harvest". Can't wait!!!

Sunday, April 4, 2010

#19: Take care of stick pile in the backyard

Today is Easter, so technically lent is over. And there is more of the stick pile left, so technically this task isn't complete. BUT I'M COUNTING IT ANYWAYS!

Pretty much since we moved in, there has been a large pile of sticks in the backyard. Over the years we've added to the pile. However, over yesterday and today Hubby has cleared the pile to the back alley (where the city will come to chip in a few weeks). He also trimmed a tree in the back and added those limbs to the back alley pile. Now the only stuff left were the old pile is large stumps from when the former owners took down a tree. We are planning to cut those stumps up more to make firewood.